URL rules let you route chats from selected pages to specific groups of agents. For example, you may have dedicated agents skilled in different areas, like sales and support. With URL rules you can route chats to one group or the other depending on the page where the chat started.

Using URL rules, you can also play with the look and feel of your chat window on a page-to-page basis. You can even set a rule that will turn the chat off on selected pages.
Route chats to specific groups of agents
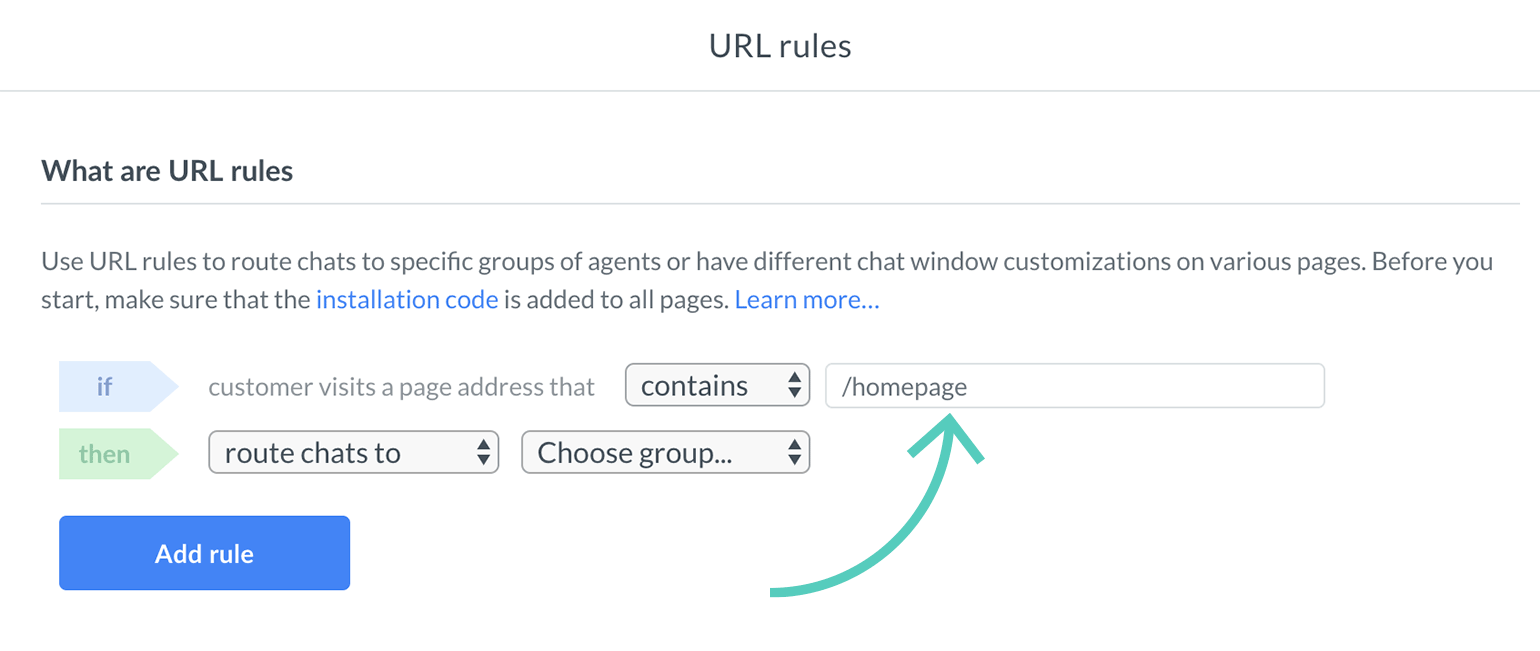
You can route chats on selected pages directly to specific groups. For example, chats from your self-service page can be routed to your support team. To do that, follow these instructions:
- Log in to 89����ô�� and go to Settings → Chat settings → and click on Add your first rule.

- Enter the URL address of the page you want to route chats from. This can be either a partial or an exact match.
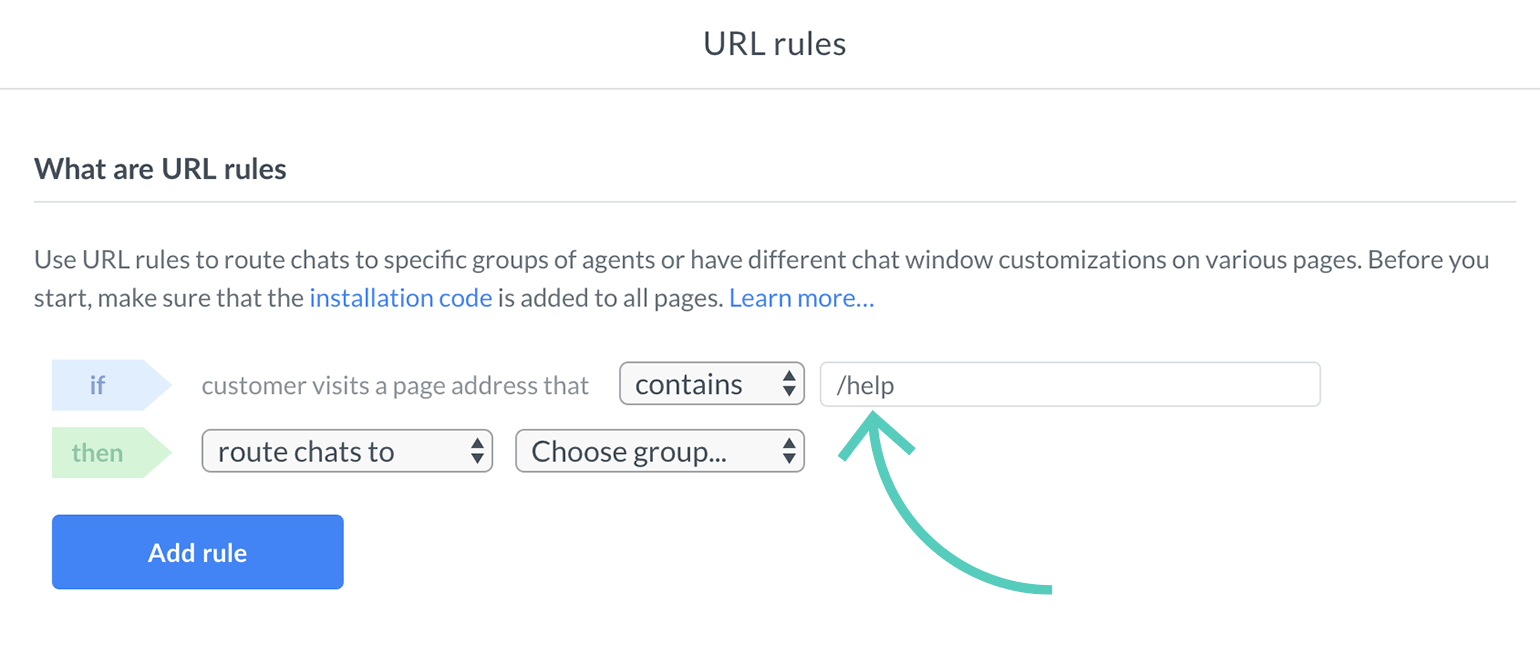
Use contains to match a part of a page address. For example, you can cover all product pages creating just one rule for all pages.
The is exactly option means that the entire page address must match. It’s useful when you want to use the rule for a specific page.
Use contains to match a part of a page address. For example, you can cover all product pages creating just one rule for all pages.
The is exactly option means that the entire page address must match. It’s useful when you want to use the rule for a specific page.
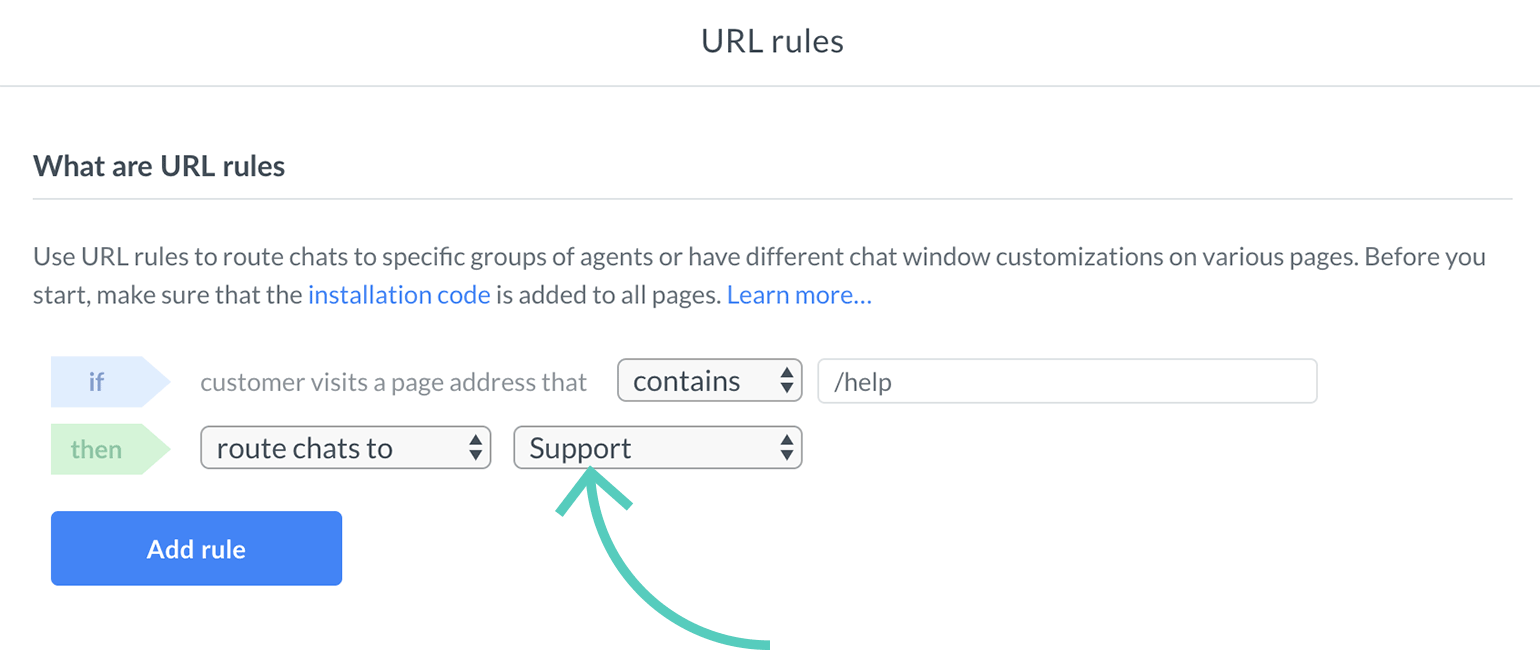
- Next, choose the group that will answer chats coming from those pages.
- To finish, click on Add rule.
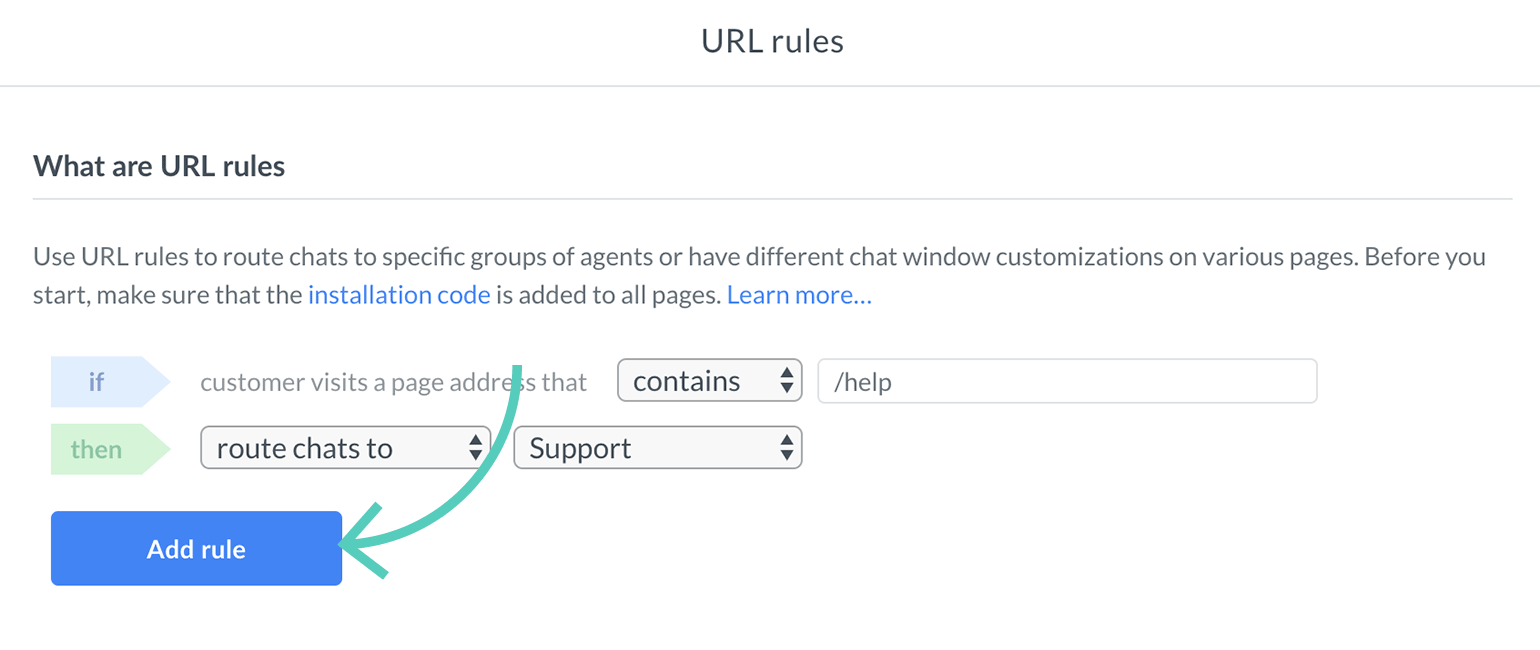
From now, all chats started on the specified page will be routed to agents from the selected group.
Customize chat widget on different pages
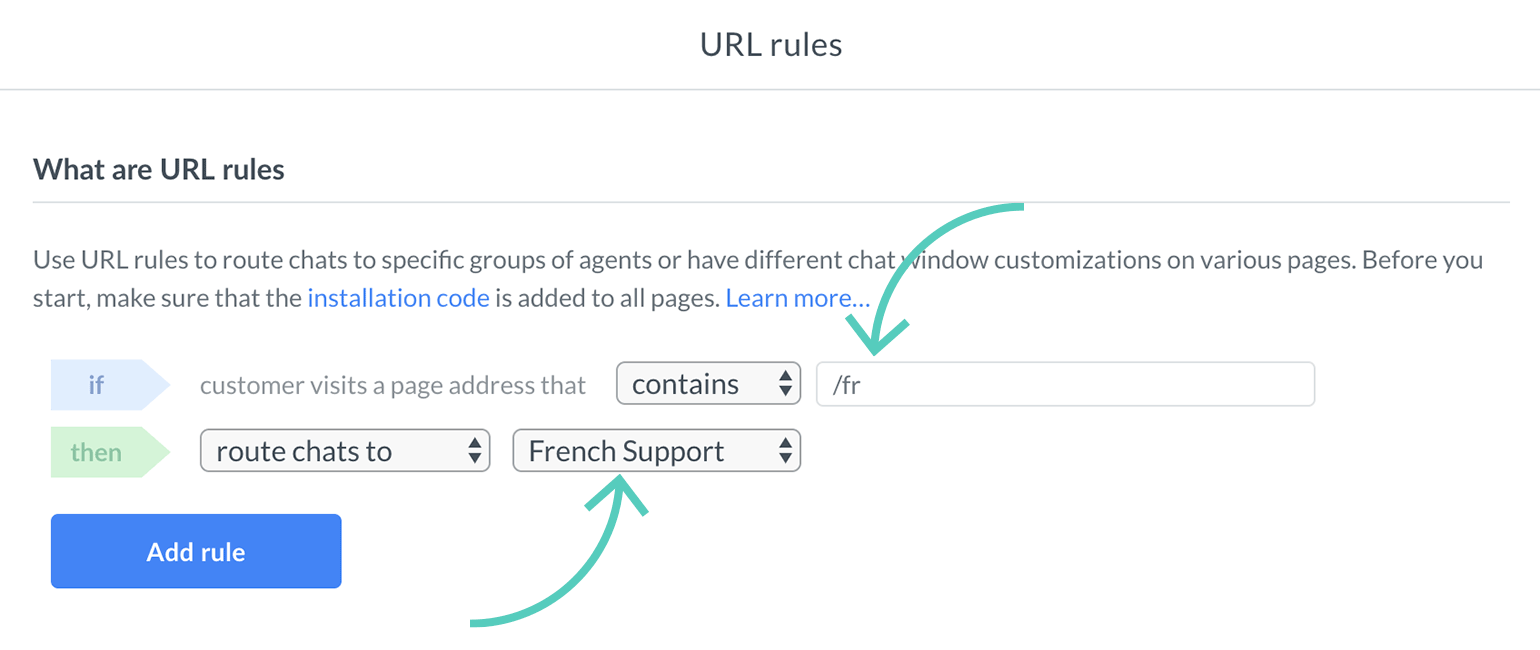
You can use URL rules and groups to change how your chat widget looks and behaves on different pages. For example, if you have an English and a French version of your site, you can display your chat widget in a language that matches the page’s language.
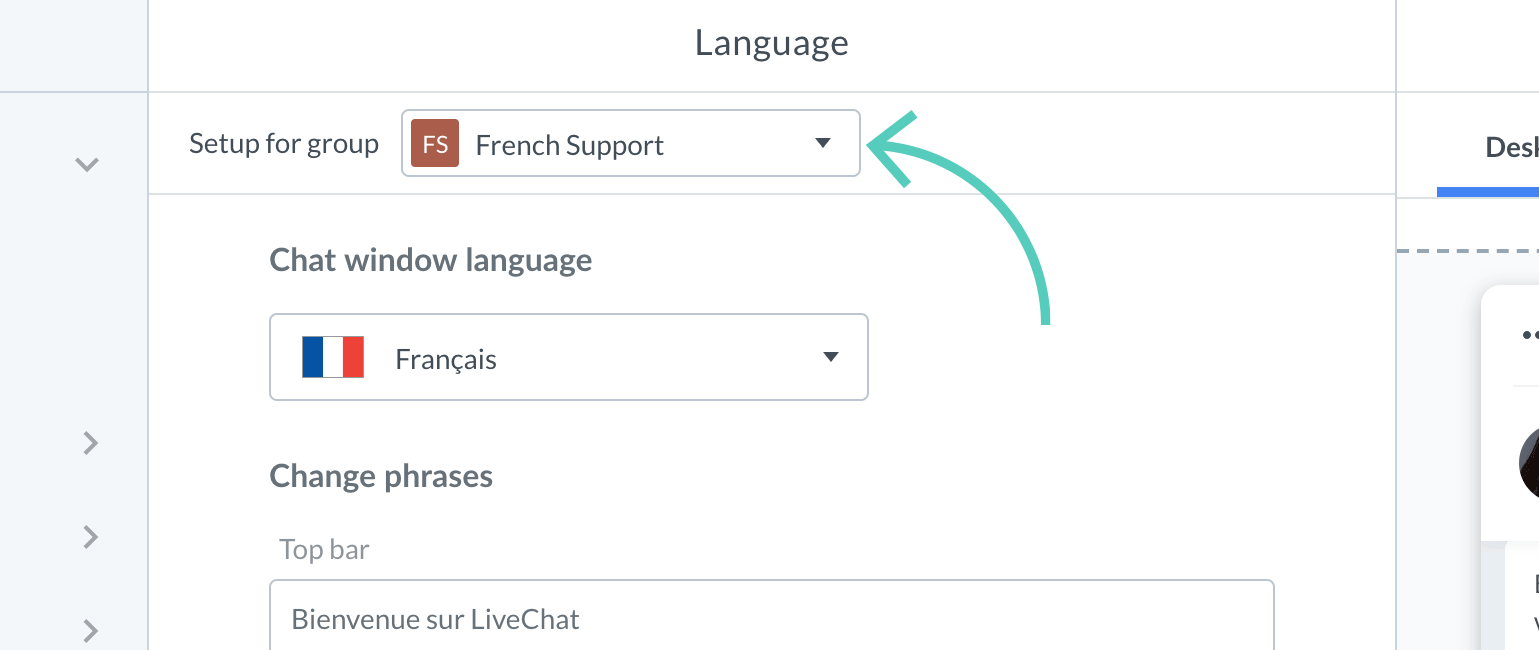
If you want to change the chat window to French for a particular page, start by creating a group for agents who know that language. Learn more about groups.
Once you have the group set, assign the URL address of your French site to the group of French-speaking agents.
Next, go to Settings → Chat window → and select the French group using the Setup for group option.
That’s it. You can also change many other settings for a group. Here’s a full list:
- —change the look and feel of the chat widget on both desktop and mobile versions of your site.
- —set the language and personalize chat widget messages.
- —edit pre-chat survey settings.
- —change post-chat survey settings.
- —personalize queued visitor message.
- —edit ticket form settings.
- —set and edit greetings.
- —choose from a gallery or add your own eye-catcher.
- —add a chat button to your site.
- —add and edit canned responses.
- —add and edit tags.
- —forward your support e-mail to 89����ô��.
- —set automated emails to visitors.
Disable 89����ô�� on selected pages
You can turn off the chat widget on selected pages by using the URL rules. It’s useful if you get too many unproductive chats from certain pages, like your main page, and you want to keep your 89����ô�� only on pages that generate better leads, such as your product pages.
Follow these steps to disable the chat widget on a selected page:
- Log in to 89����ô�� and go to Settings → Chat settings → and click on Add your first rule.
- Specify the page address (or a part of the address) you want to disable 89����ô�� on.
- Select turn chat off.
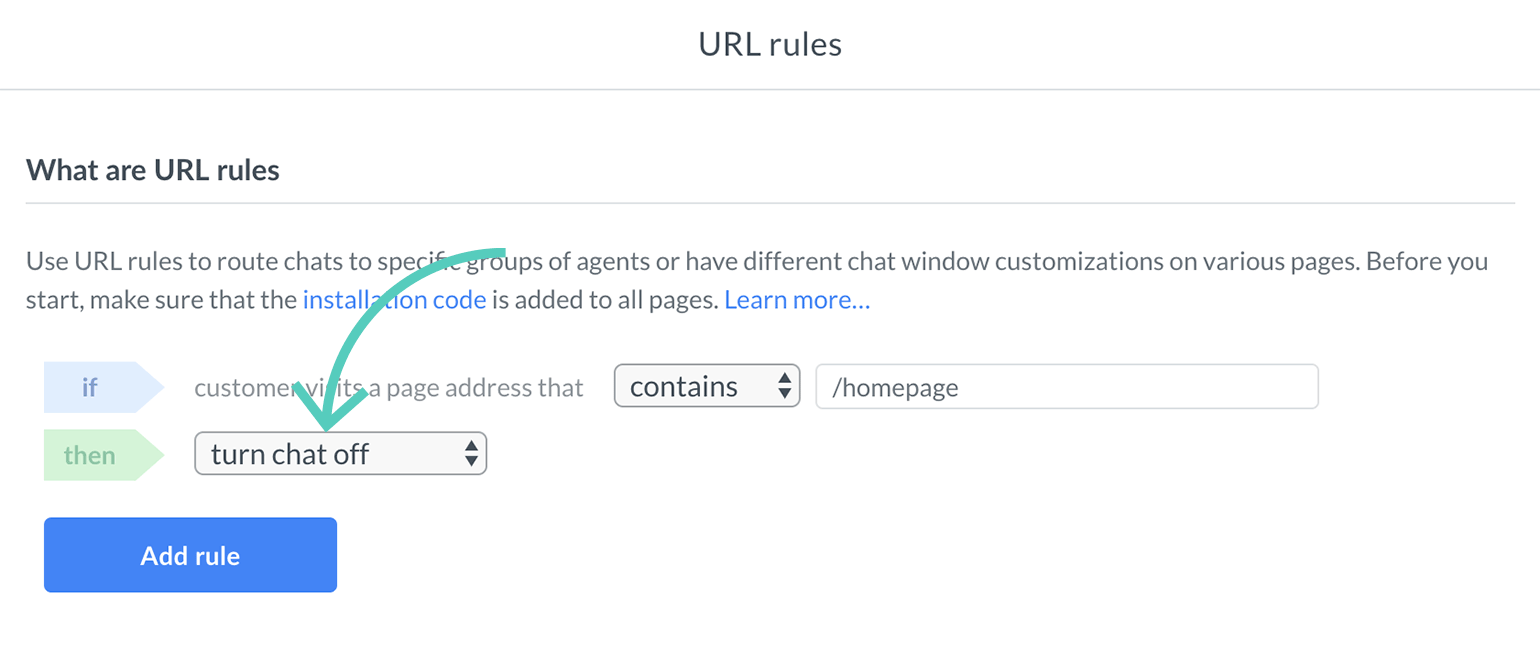
- Click on Add rule

That’s it. The chat widget will now be disabled on the specified page.