You can use Slack as an additional way of getting 89����ô�� notifications by hooking it up to 89����ô�� using Zapier. If you are using Slack a lot, this is your best bet at not missing any important chats.
Configuration
Start off by logging in to and clicking on the Make a Zap! button.

Next up, choose 89����ô�� and Slack as the two applications you want to connect.
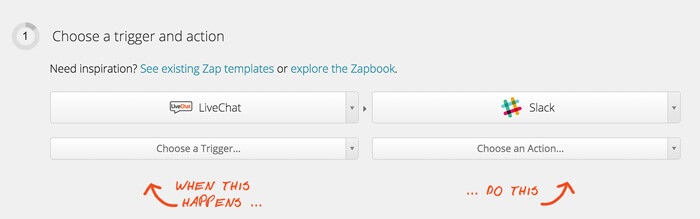
Depending on the notification you want to receive, you can choose to either select a New Chat option for the trigger or have it fire when a visitor enters a queue. For this tutorial, we’ll go with the New Chat option.

For the action, choose Send New Message. Click on Continue to proceed.
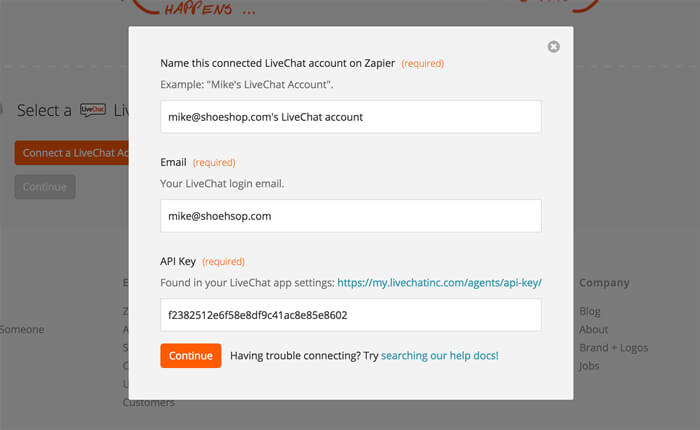
Next, you will need to provide your 89����ô�� account details. Enter the name for your account, your license number and your API key. Click on Continue to proceed.
Click on the Continue button again.
You will need to choose a Slack account you want to use for the integration. Once that’s done, press Continue.

You can then decide if you want to filter particular chats. For the purposes of this tutorial, we won’t filter any chats and simply proceed by clicking on the Continue button.
Next, you need to specify how the notification will look like. In the Channel section, you can select the channels or users to which the notification will be sent. Simply type in the channel name (preceded by ‘#’) or user name (preceded by ‘@‘).
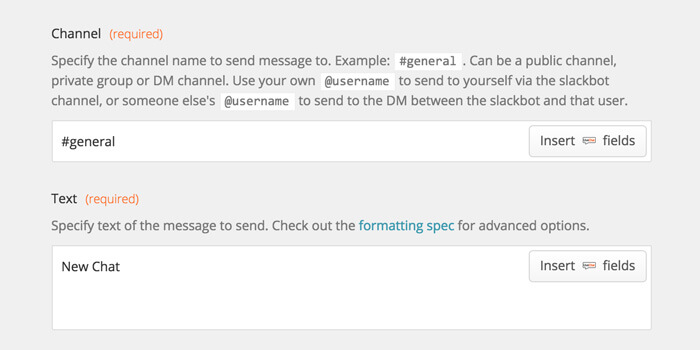
The next section will decide the text that will be sent when you get a new chat. You can simply type in New Chat and move on or select one of the available 89����ô�� options like Chat Started option available after pressing the Insert 89����ô�� Fields button.
You can use the optional sections to customize the notification further and, for example, add a visitor email to the notification. Once you’re done, click on the Continue button.
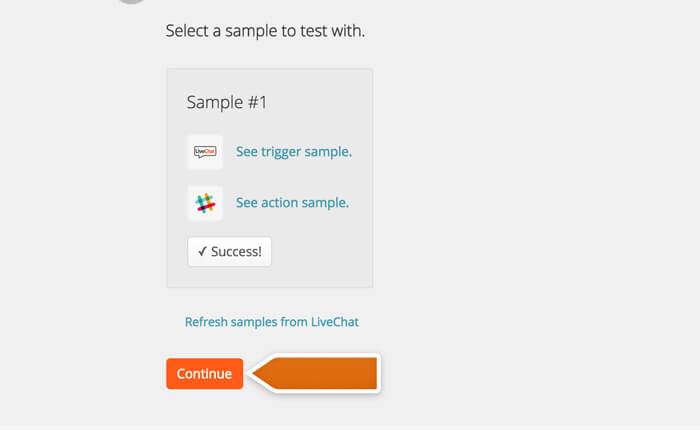
Now, test the Zap. Click on the Test 89����ô�� trigger button. You will need to follow the test instructions. When the test is complete, click on Continue.
All that is left to do is naming the Zap and turning it on.
From now on, whenever you get a chat, you will also get a notification on Slack about that.