Receive messages from your Facebook pages right in the 89����ô�� app. Keep all your communication in one place, to make your team more effective and provide better customer support
Other benefits of our integration with Facebook Messenger:
Connect multiple Facebook pages to your 89����ô�� account — if you run a couple of Facebook pages, you might want to link all of them to one 89����ô�� account. To make sure that you always know which fan page your messages are coming from, you can assign each page to a specific group
Send rich messages to your fans—use cards, product carousels, quick replies and suggested responses thanks to our integration with ChatBot. Rich messages are displayed both in Facebook Messenger and the 89����ô�� app
Connect 89����ô�� to Facebook
The installation takes only a few minutes. Log in to 89����ô�� and follow these steps:
1
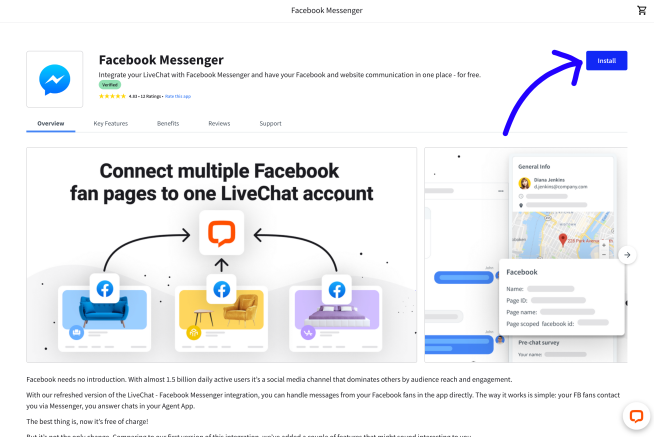
Go to the page in our Marketplace. Then, select get in the top right corner.
2
Select Settings.
3
Select Connect to Facebook.
4
Provide your Facebook credentials and Log in.
5
Choose Continue as [your name].
6
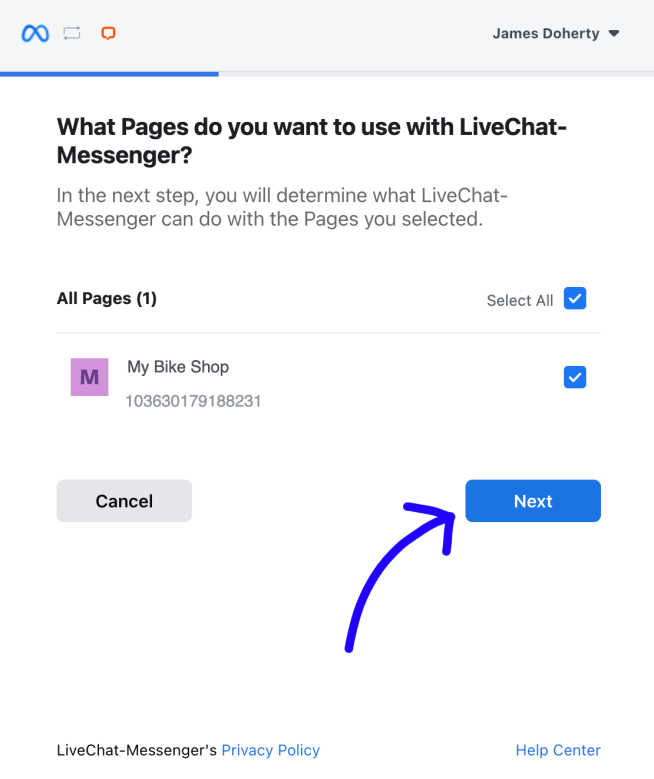
Choose pages you want to connect to 89����ô�� and pick Next.
7
Make sure all options are on and select Done.
8
Finally, select Ok.
9
In the last step, you can choose which group should receive chats coming from a particular page (optionally). To finalize, select Connect Page. Repeat this step for all the pages you want to connect.
Owing to the Facebook/WhatsApp policy, you have 24 hours to respond to a message. After that time, the chat will be archived and you won’t be able to reply. This policy is in place to protect against spamming.
When the integration is complete, a Facebook Message bot is added to your list in the Agents tab. This bot is there, but needs to stay disabled in order for the integration to work properly.
Messenger Opt-ins
An Opt-in is a type of message that you can share with customers to gain their consent to send them marketing campaigns at any time.
The 89����ô�� integration with Messenger introduces an easy-to-use configurator for setting up and customizing your opt-in messages.
Here’s how to set them up:
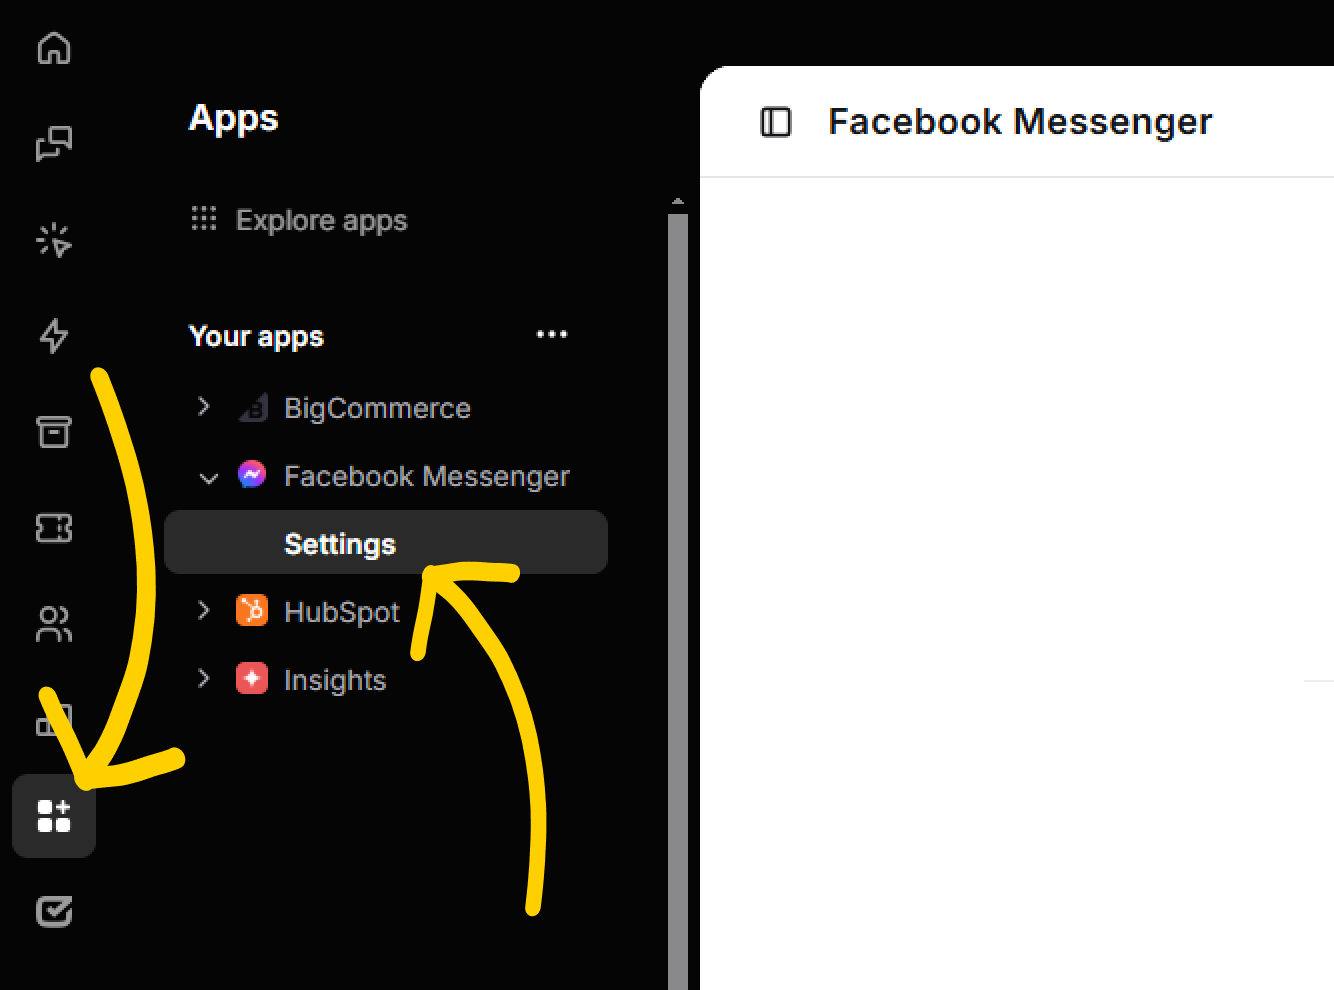
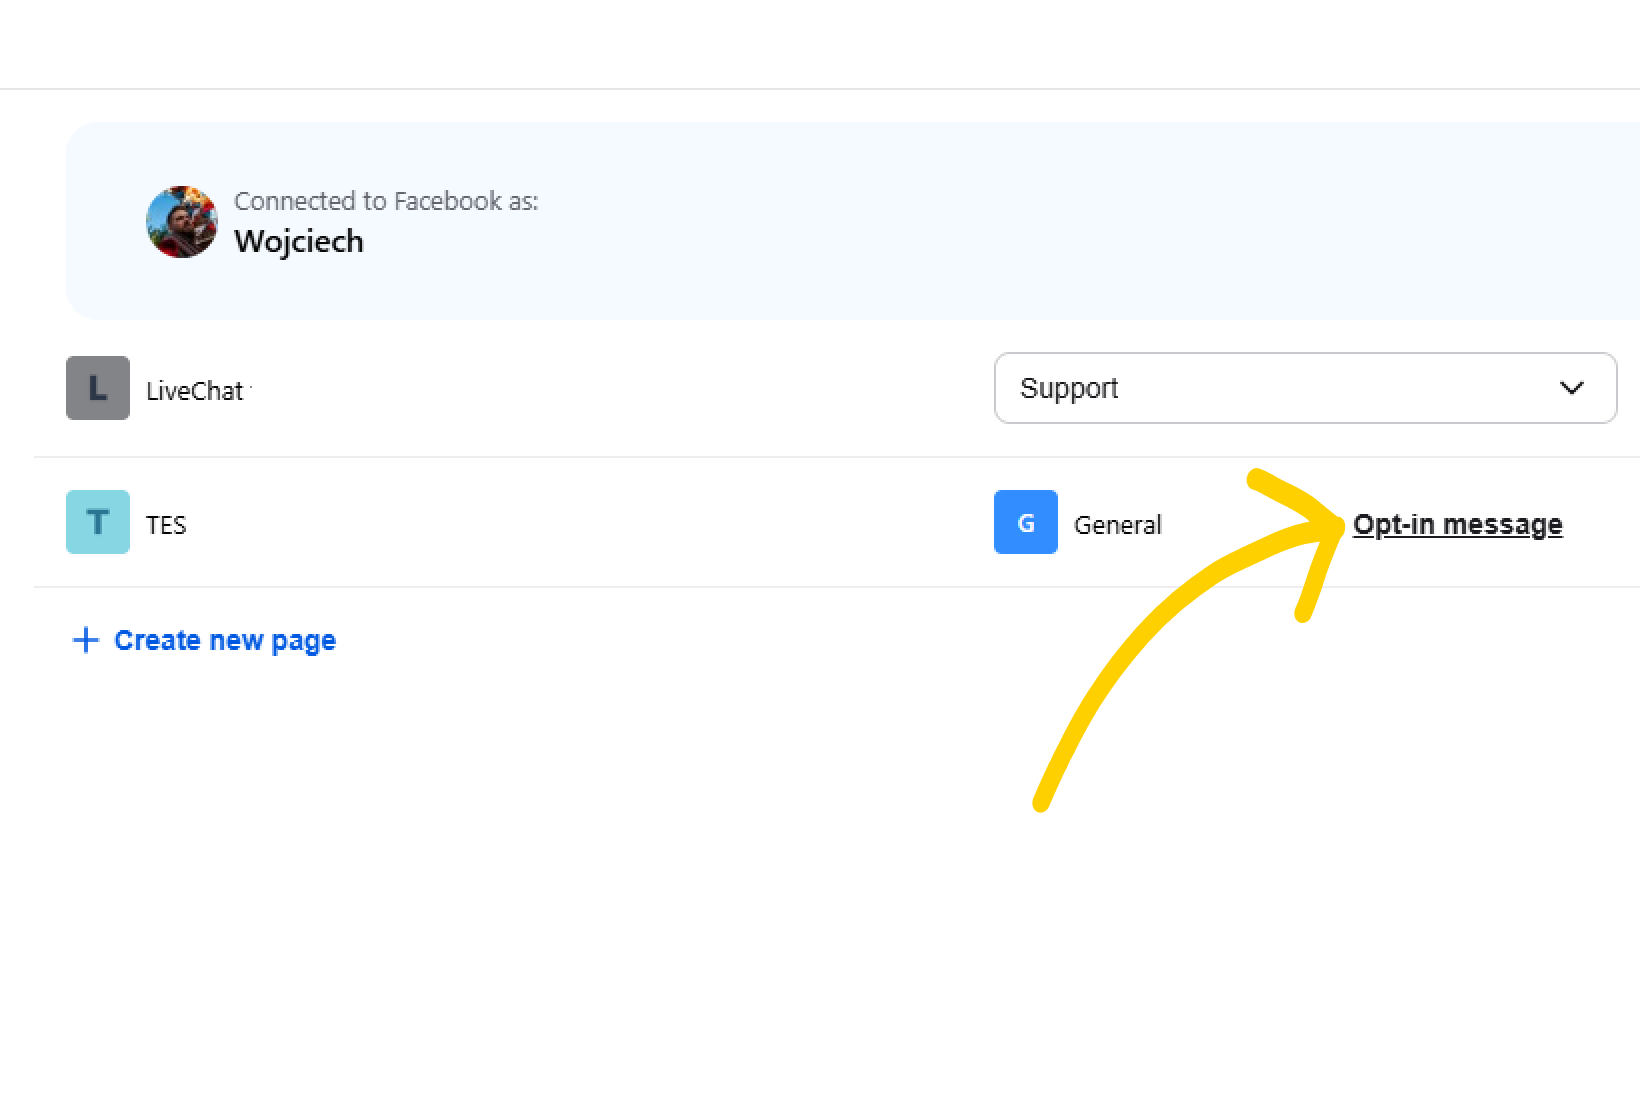
1. Enter your in the 89����ô�� Apps section.
2. Select Opt-in message.
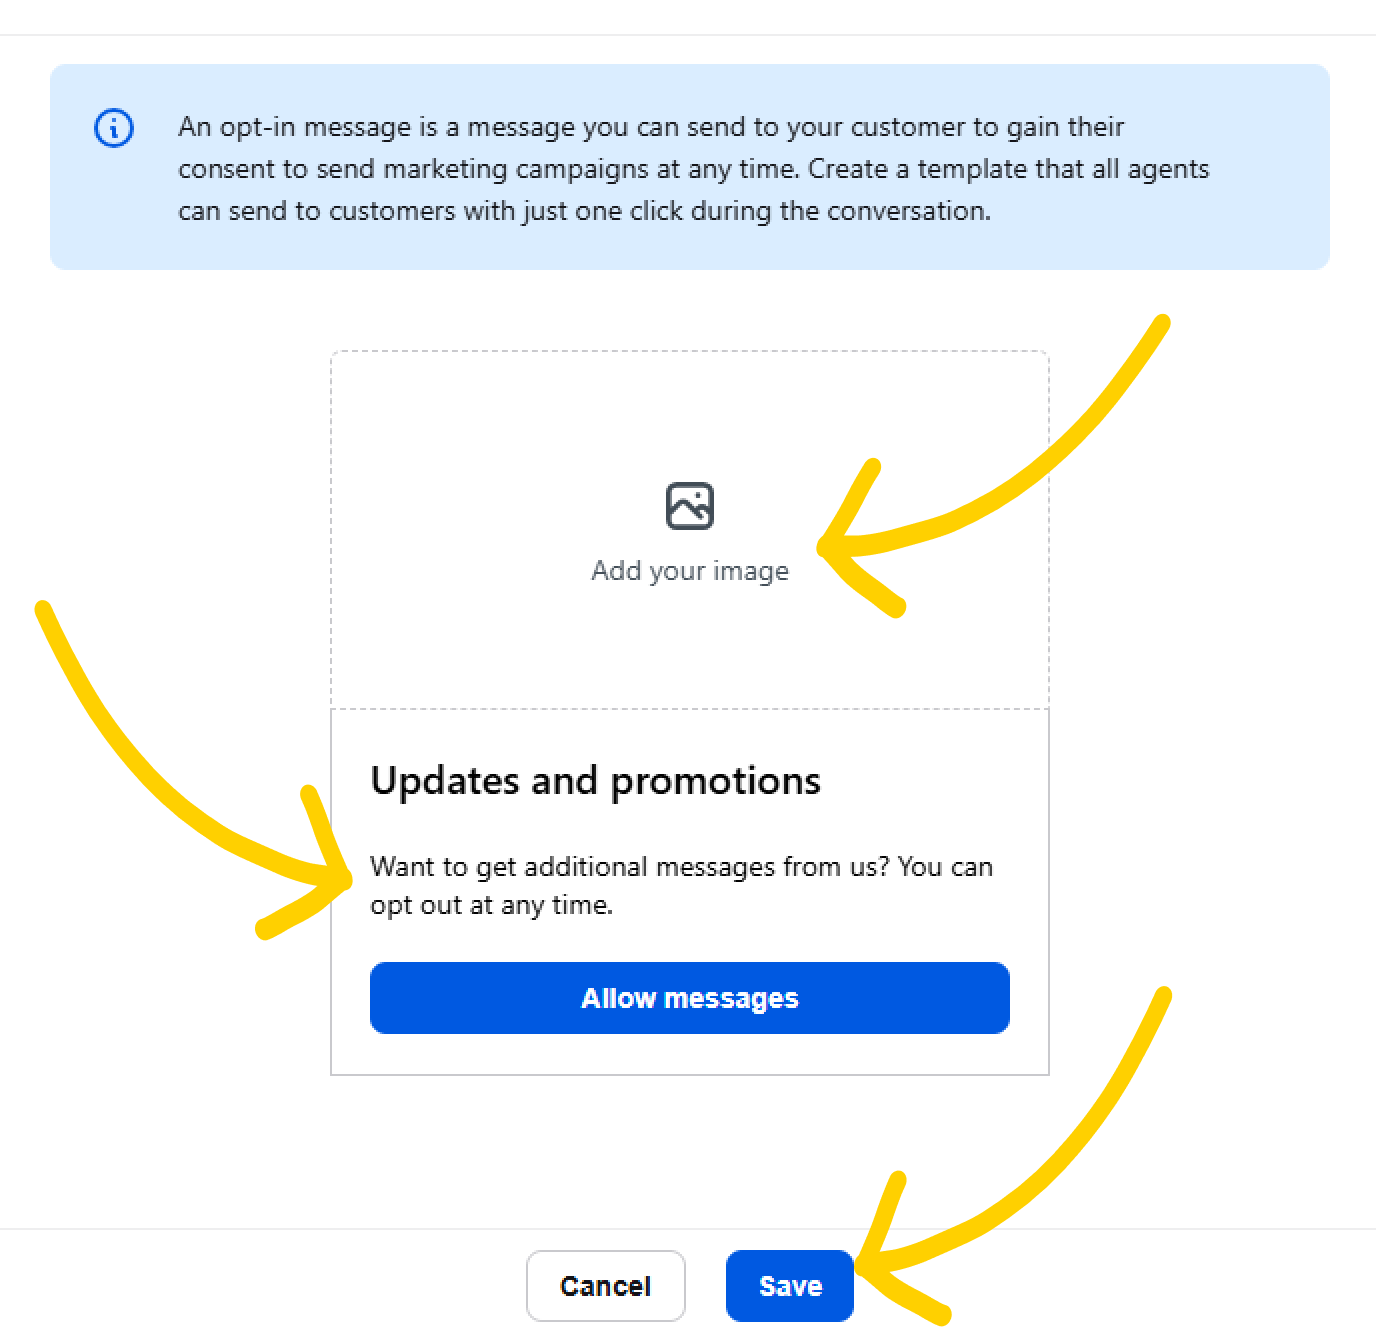
3. Edit the text and add an image to your template. Save when you’re done.
You can create a dedicated opt-in message for every Facebook business page connected with your 89����ô�� account.
You can create a dedicated opt-in message for every Facebook business page connected with your 89����ô�� account.
Your agents can now start sharing opt-in messages while chatting with your customers.
They can do so with a single click. Here’s how:
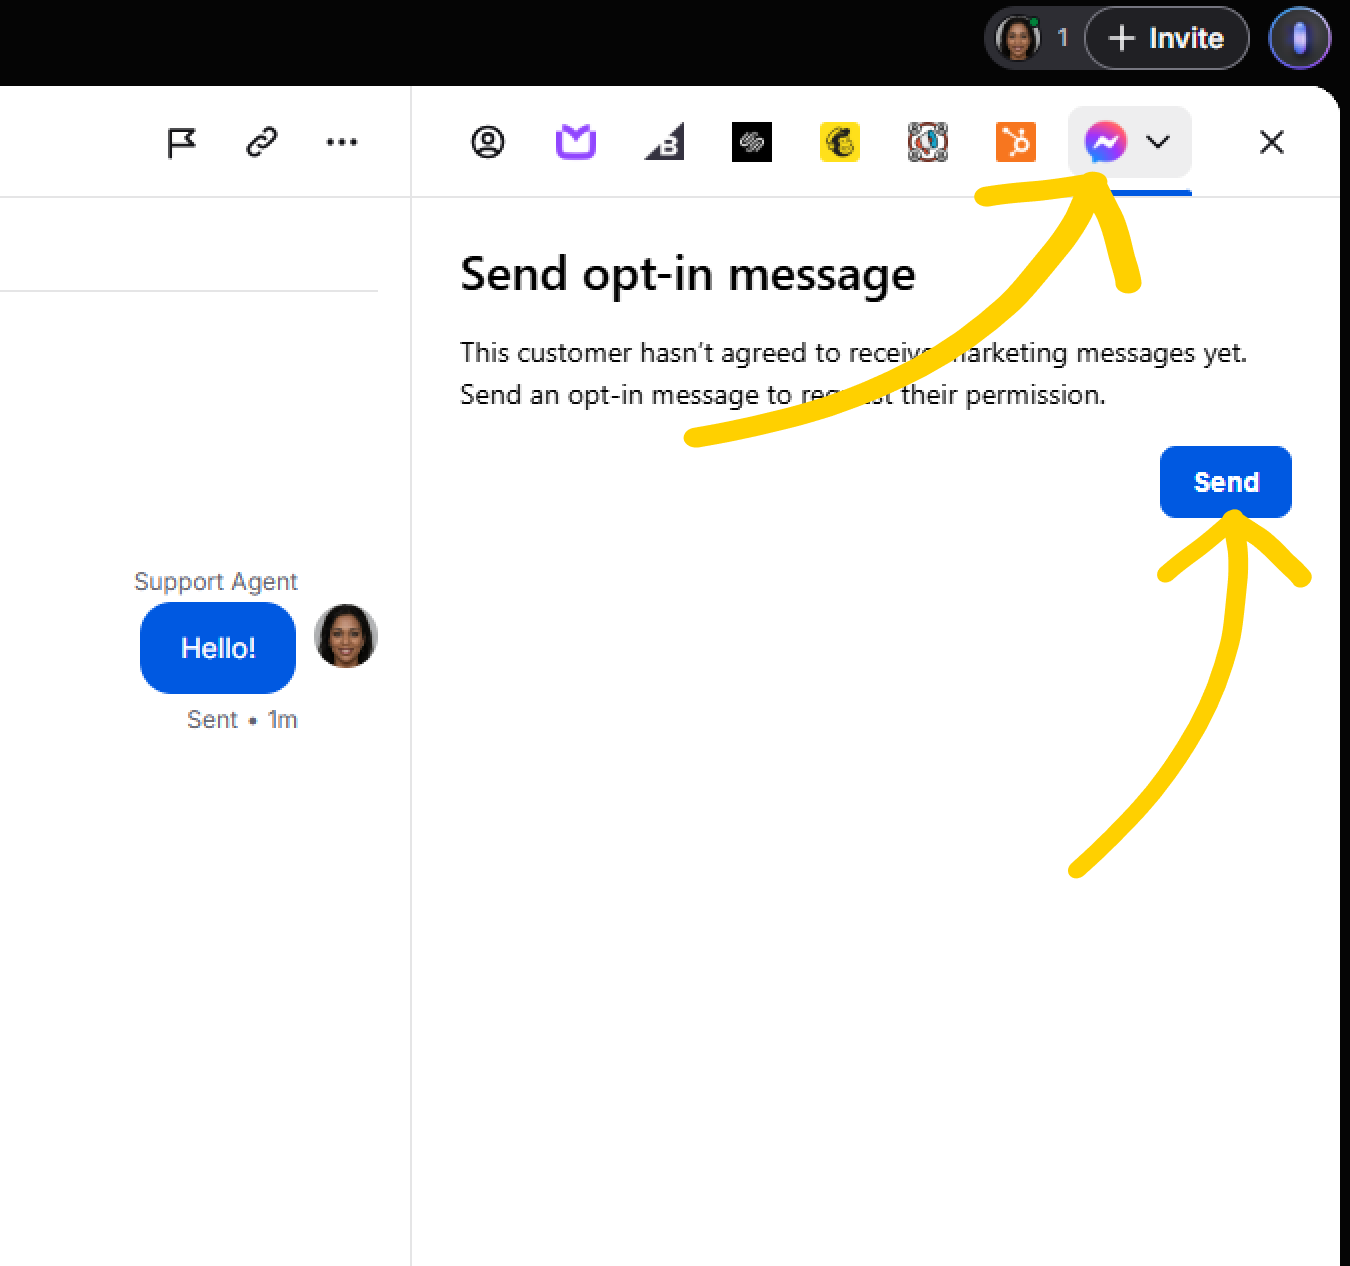
1. During an active chat with a customer contacting you via Messenger, select the Messenger icon in the Details column.
2. Select Send.
Here’s how the message will look on the agent’s end:
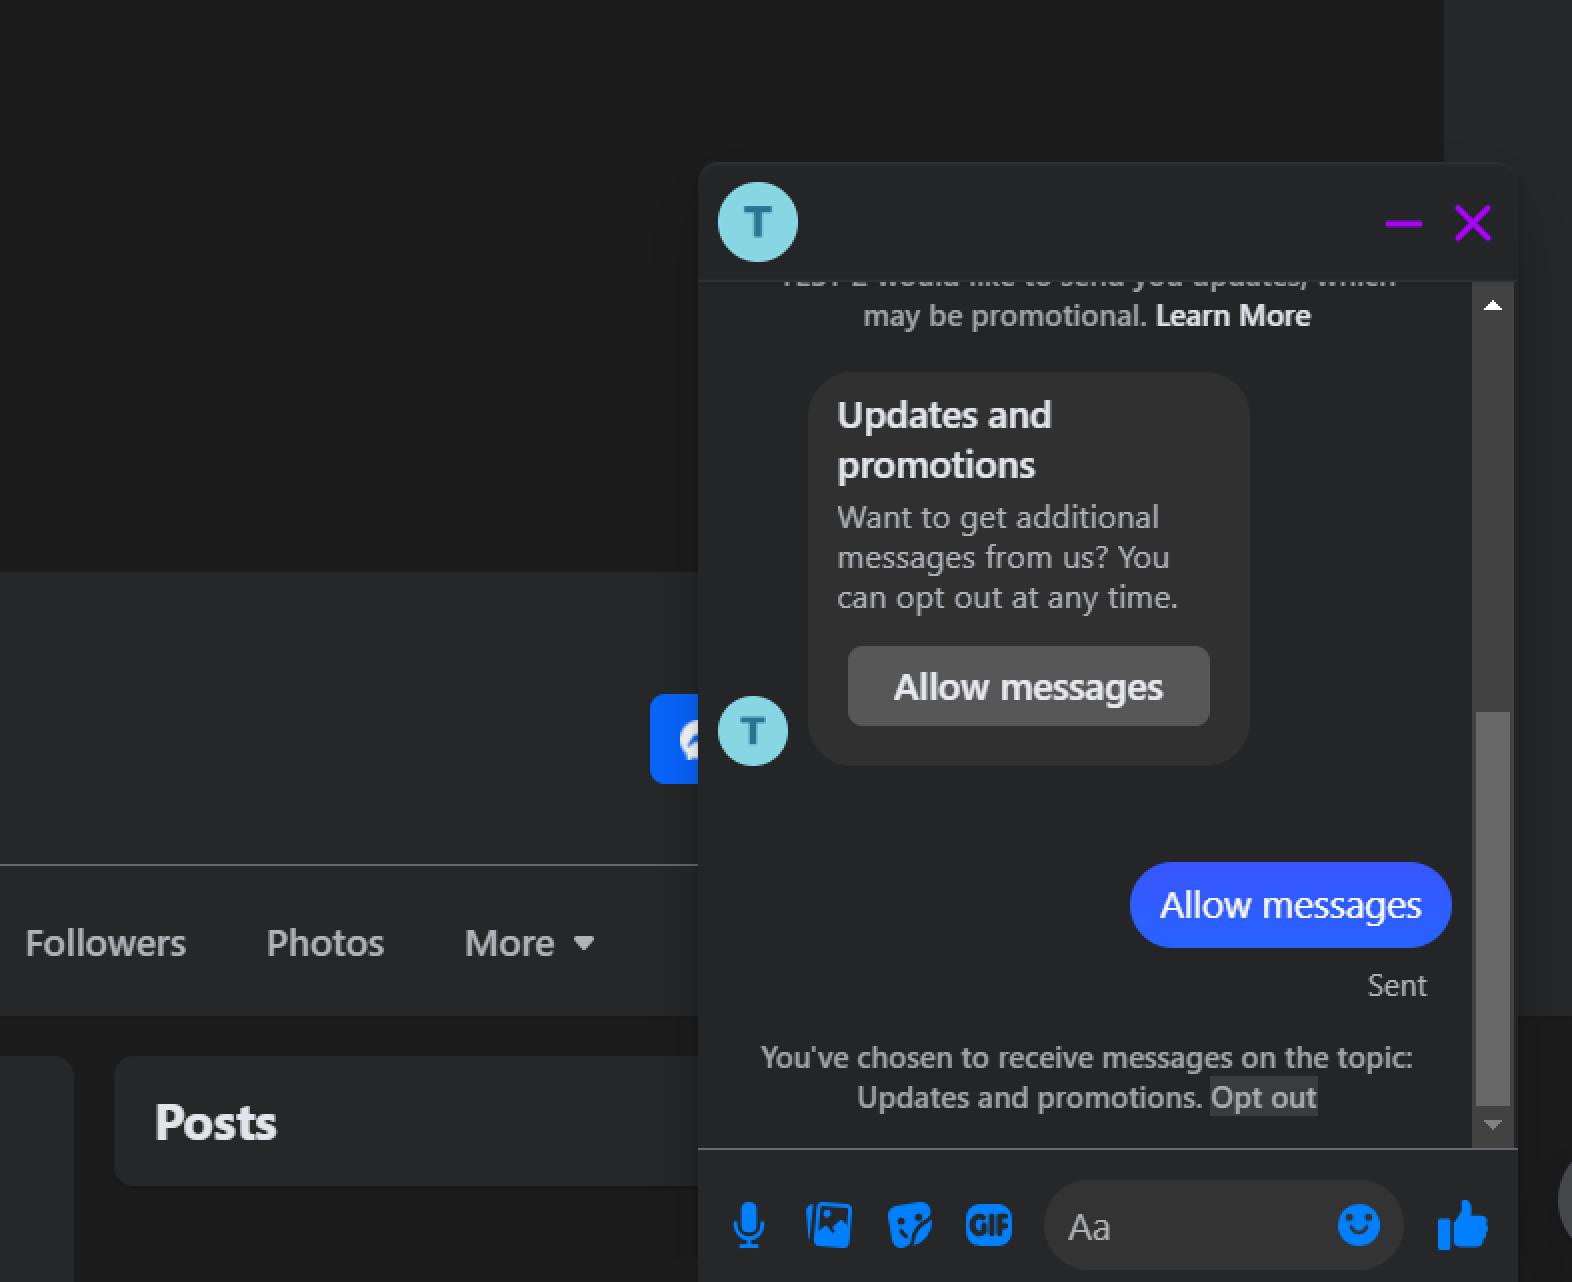
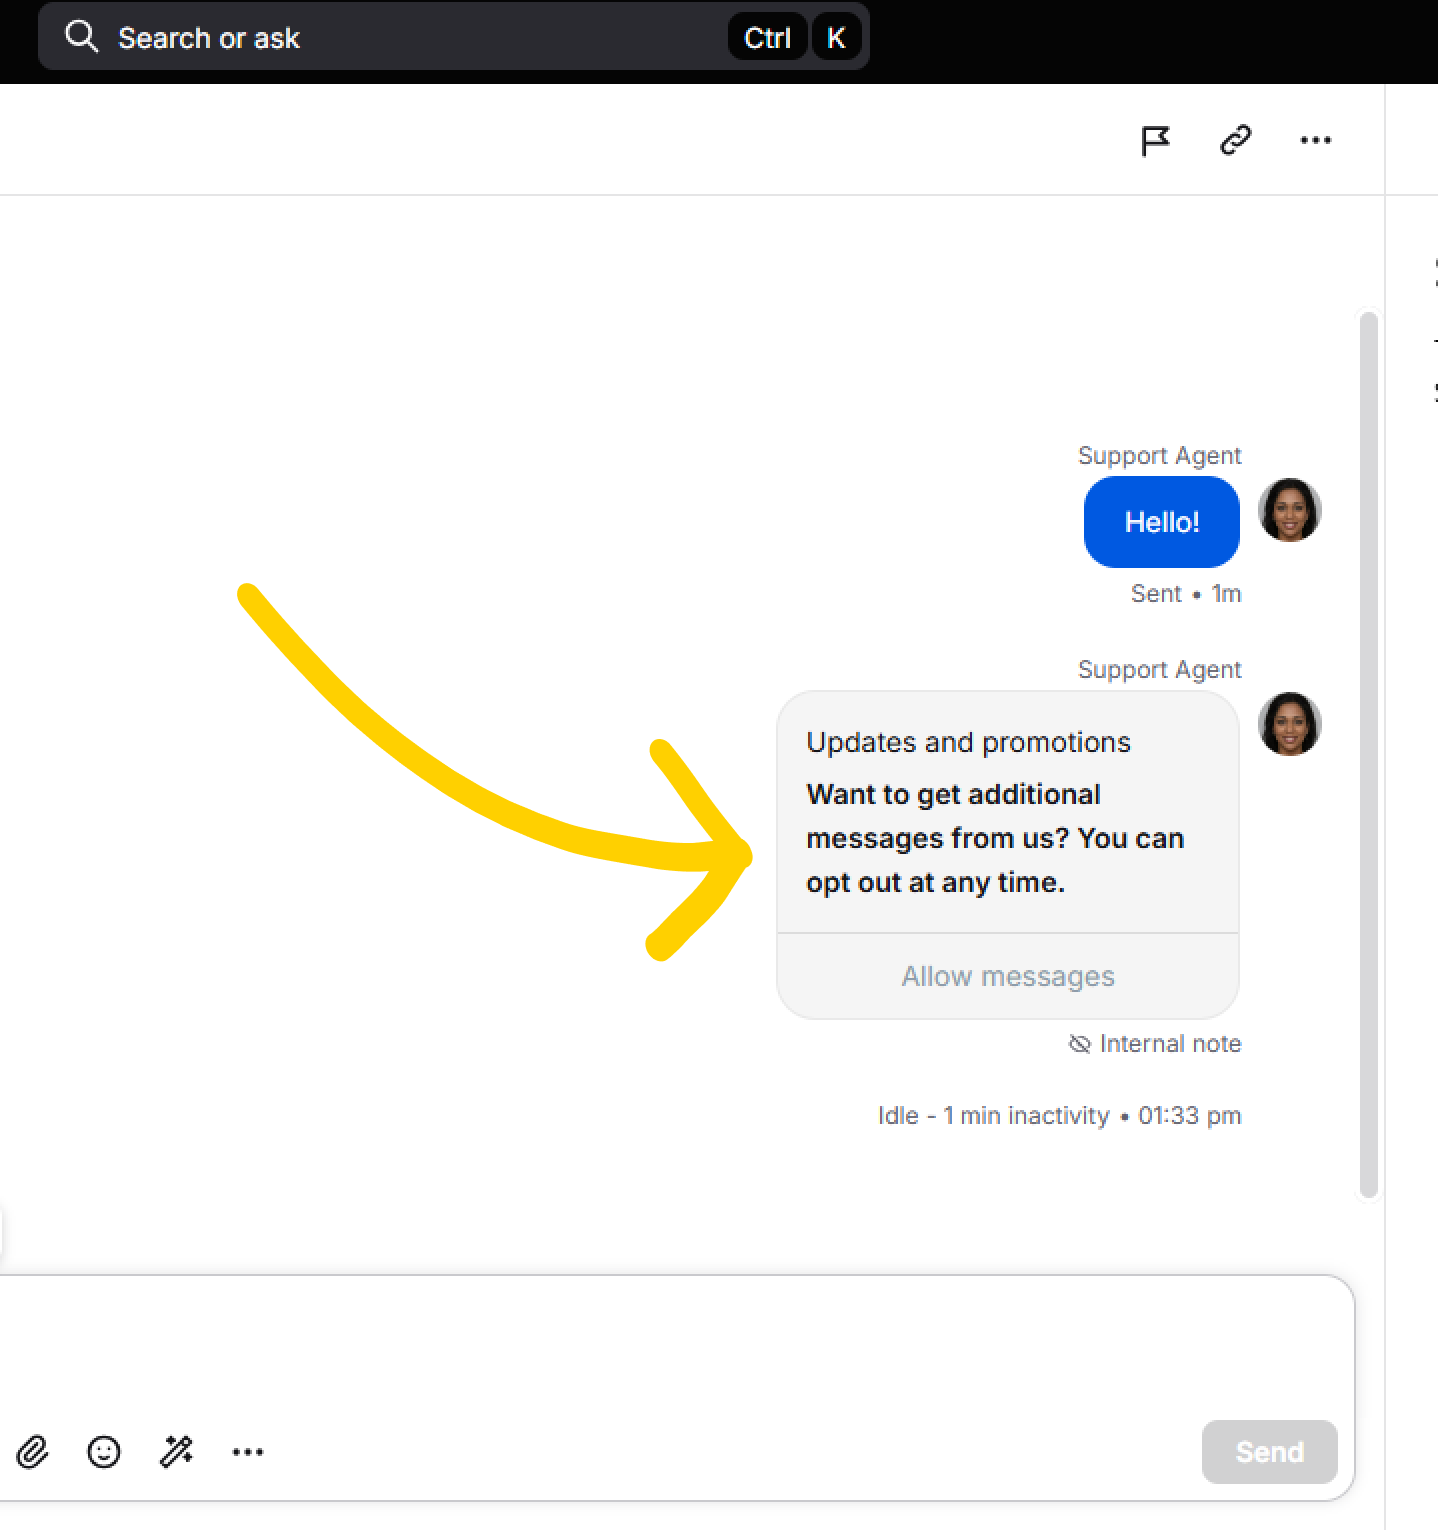
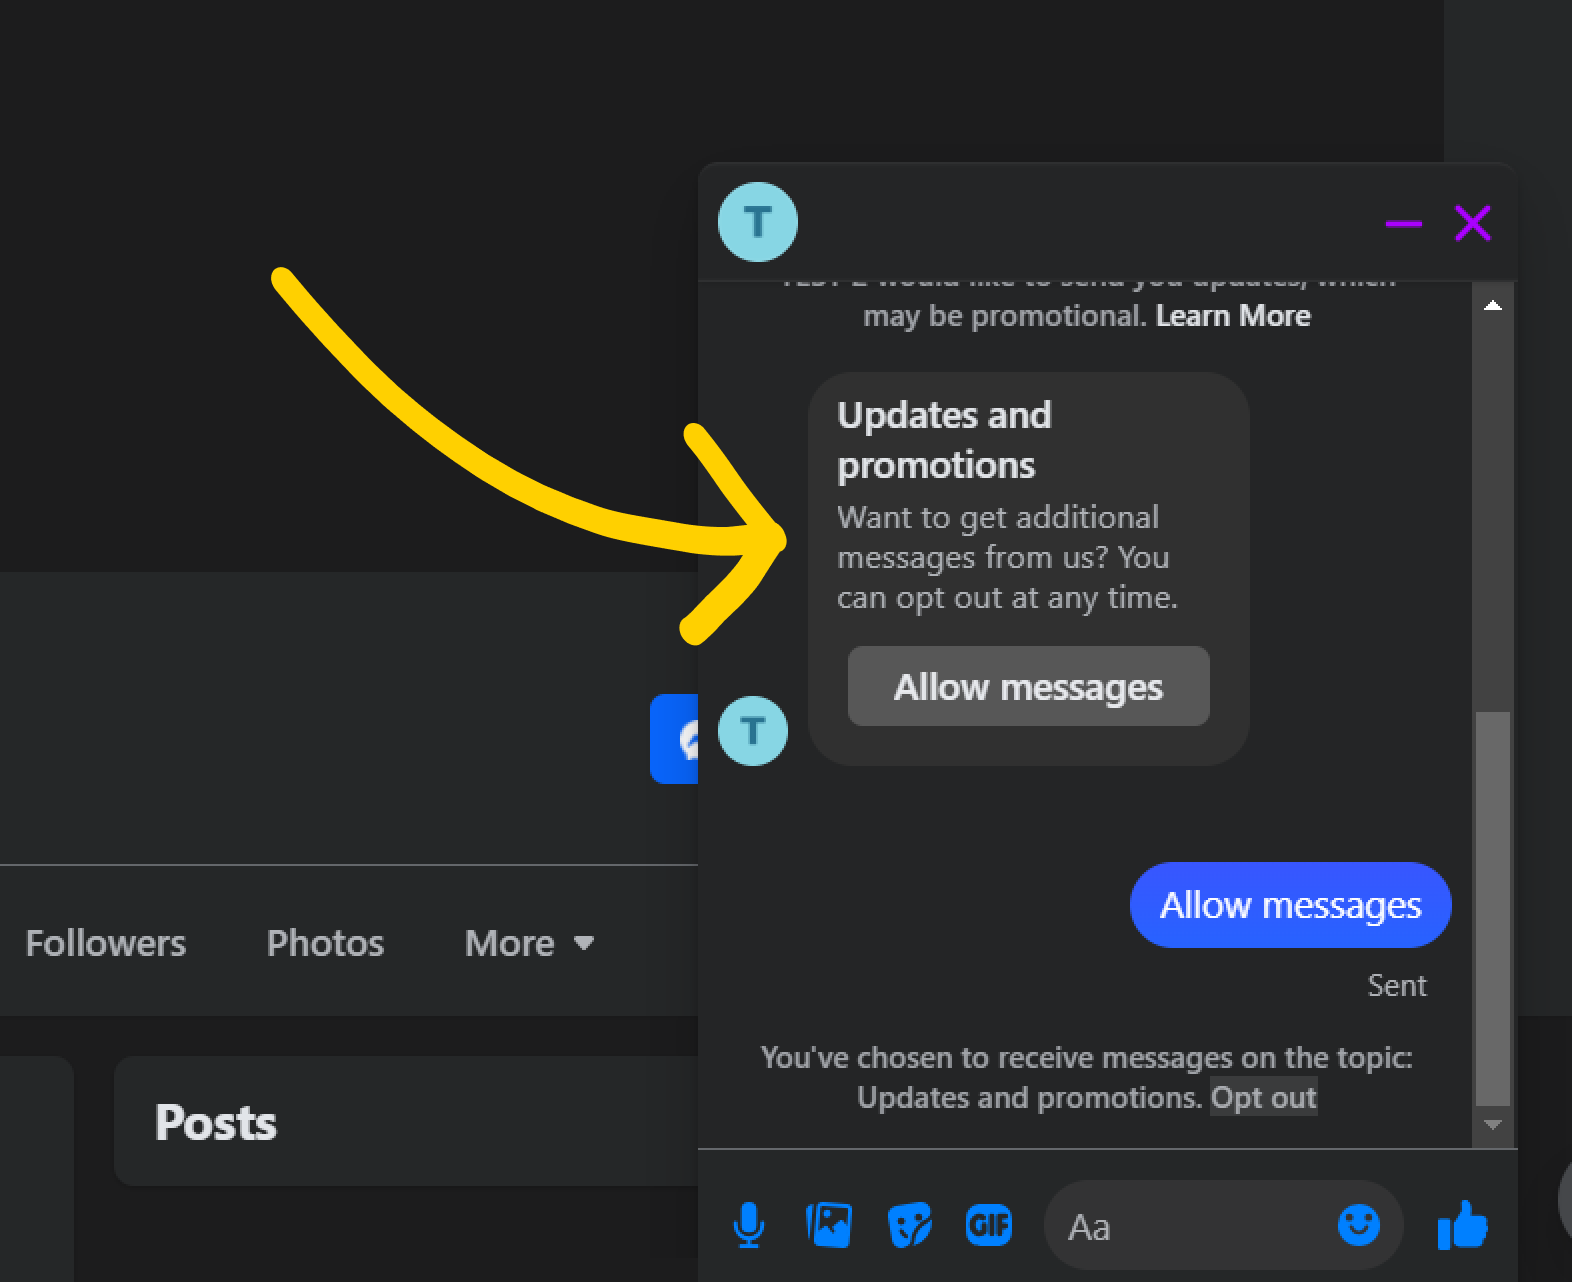
And here’s how it looks on the customer’s end:
The only thing left to do is to start sharing those opt-ins. Give them a shot!
Troubleshooting
It can sometimes happen that despite installing the integration with Facebook Messenger, the messages still don’t come through to 89����ô��. This may be because 89����ô�� has to be set as the primary receiver in the handover protocol on Facebook. The primary receiver is the app that handles all incoming messages when two different apps are integrated with a Facebook page. This section is a step by step guide on how to check it and set it up.
Please note that the integration doesn’t support Facebook .
1
Log into your Facebook Business page.
2
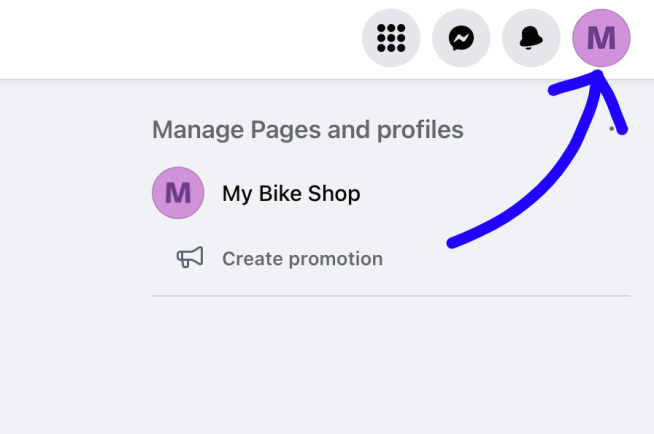
Select the button with your shop’s avatar in the top right corner of the page.
3
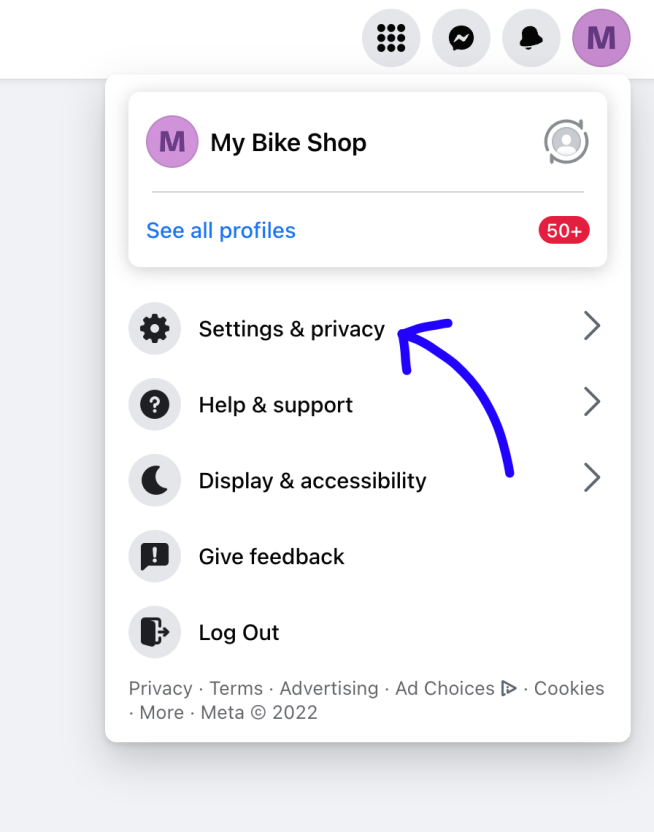
Pick Settings & privacy.
4
Choose Settings.
5
In the next menu pick New Pages Experience.
6
Finally, select Advanced Messaging.
7
There you should see 89����ô��-Messenger among your Connected Apps. Under Handover Protocol, pick Configure next to Messenger receiver.
8
In the pop-up, set the Primary receiver for the handover protocol. Pick 89����ô�� from the drop-down menu under Select button.
Now that 89����ô�� is set as your primary receiver, the messages from Facebook Messenger should appear in the 89����ô�� Agent App.
Disconnect Facebook from 89����ô��
To disconnect the Messenger app from your 89����ô�� simply go to Settings>Manage Apps> in the Agent App, choose the ... button next to Facebook Messenger and pick Uninstall.
Once you’ve done it, your fan pages will be disconnected and the app uninstalled.
Facebook Pixel: track 89����ô��-related data and see how many chats, surveys or tickets have your customers engaged in, straight in Facebook Ads Manager!